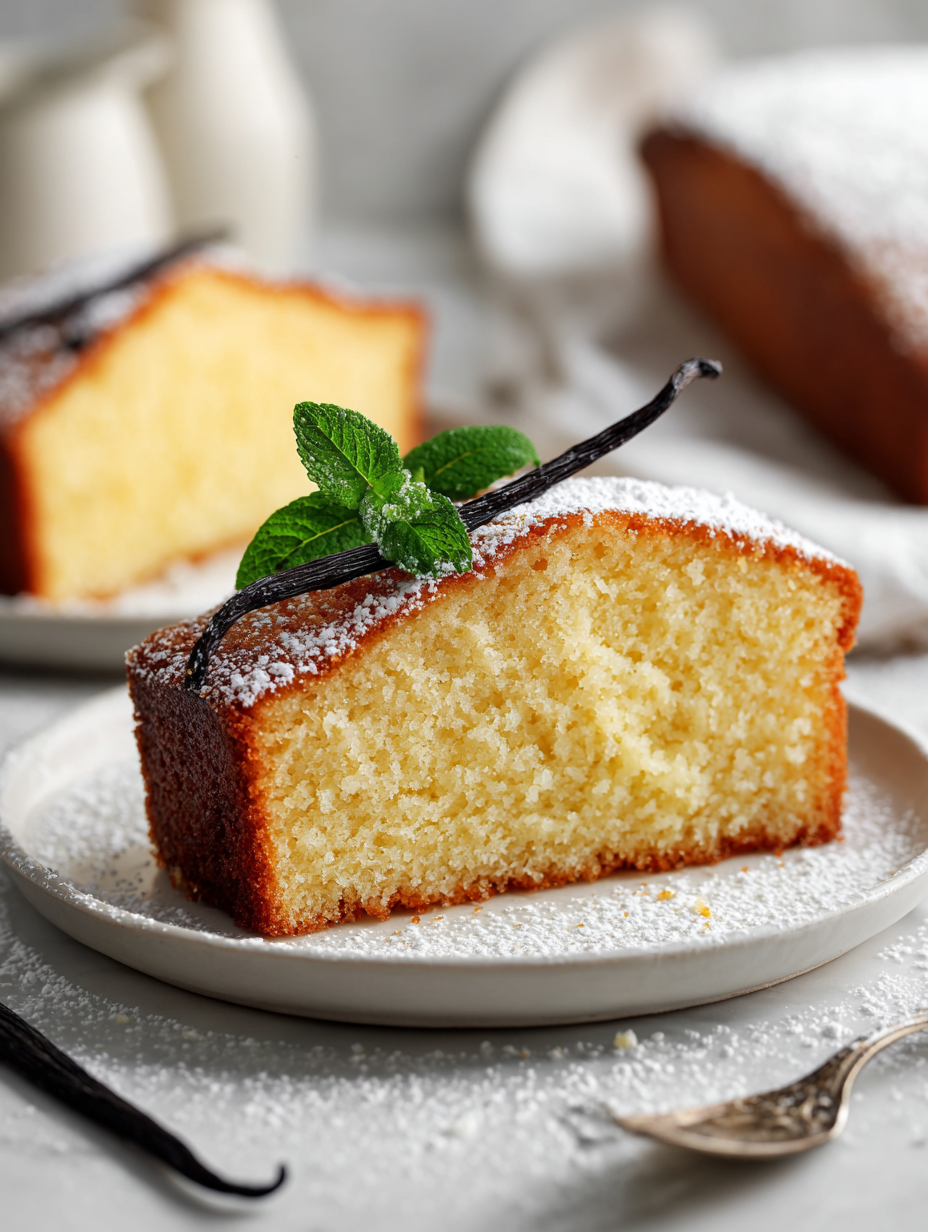
This vanilla pound cake is my go-to for whenever I want something simple yet versatile. It’s not flashy, but its dense crumb and tender crumb make it a perfect blank canvas. I love how it can go from plain to fancy with just a handful of seasonal fruits or a drizzle of honey.
What keeps me coming back to this recipe is its honest, straightforward nature. No fancy gadgets needed, just a good mixing spoon and a loaf pan. It’s the kind of baked good that feels familiar but still makes me feel like I’ve accomplished something special, especially when I share it with friends or family during lazy weekends.
Focusing on how the humble vanilla pound cake can serve as a blank canvas for seasonal fruit toppings and creative flavor twists, turning a simple dessert into a personalized, ever-evolving treat.
A Classic That Embraces Simplicity
- Baking this cake always takes me back to my grandma’s kitchen, filling the house with that warm vanilla scent.
- I love how this simple recipe feels like a quiet victory, especially when I pull the golden crust from the oven.
- There’s a strange comfort in its dense crumb, like a soft hug on a tough day.
- Sharing slices of this pound cake with friends always sparks conversations about childhood treats and family traditions.
- It’s imperfect in the best way—sometimes a crack runs down the middle, and that’s just part of its charm.
The story behind this recipe
- This vanilla pound cake came from a moment of needing something reliable, something that didn’t ask for fancy ingredients or complicated steps. I remember baking it late on a rainy Sunday, the smell of vanilla filling the house and making everything feel a little brighter. It’s humble, yes, but that’s exactly what makes it so solid—like an old friend you can count on.
- I started tweaking a basic recipe when I realized how adaptable it is. It’s a blank canvas, just waiting for a splash of seasonal berries or a dusting of powdered sugar. Over the years, it’s become my go-to for everything from quiet mornings to last-minute gatherings. It’s the kind of recipe that’s less about perfection and more about the quiet joy of baking something familiar.
- heading: ‘The story behind this recipe’
Historical and Fun Facts
- Vanilla pound cake traces its roots to 18th-century Europe, where dense, butter-rich cakes were a sign of wealth.
- The term ‘pound cake’ comes from the traditional recipe’s use of a pound each of butter, sugar, eggs, and flour.
- In America, this cake became popular as a simple, reliable dessert for family gatherings and potlucks.
- Originally baked in cast-iron pans, modern recipes often use loaf or bundt pans for convenience.
- Despite its humble ingredients, vanilla pound cake has inspired countless variations—from citrus zests to chocolate swirls.
Ingredient breakdown
- Unsalted butter: I use plenty to keep the cake rich and tender; for a slightly nuttier flavor, try browned butter, but be careful not to burn it—smells amazing, like toasted almonds.
- Granulated sugar: It’s what gives the cake its sweet, mellow backbone. If you want a softer crumb, reduce by a tablespoon, but don’t skip it entirely—sugar is key to texture.
- Eggs: I find room-temperature eggs whip up better, creating a fluffy, cohesive batter. For a lighter cake, beat them well until slightly frothy before adding—feels like magic.
- Vanilla extract: The real stuff makes all the difference—smells like a warm hug. You can swap in vanilla bean paste for a more intense aroma; just scrape out the seeds first.
- All-purpose flour: I prefer unbleached for a more natural flavor, but regular works fine. Sifting it helps keep the crumb airy—don’t skip this step if you want a fine texture.
- Salt: Just a pinch enhances the vanilla and balances sweetness. If using salted butter, cut back a little—no one wants a salty surprise in their sweet slice.
- Baking powder: A small amount gives the cake a gentle lift. If it’s old or clumpy, the rise will be sluggish—test with a quick pinch of flour and baking powder first.
Spotlight on Key Ingredients
Vanilla Extract:
- I use pure vanilla for that rich, fragrant aroma that fills the house. You can try vanilla bean paste for an extra speckled, intense flavor—smells like a warm hug.
- Butter: I opt for unsalted, preferably room temperature, to ensure a creamy, tender crumb. Browning the butter adds a nutty depth, but keep an eye so it doesn’t burn—smells toasted and inviting.
Eggs:
- Flour: I prefer unbleached all-purpose for a natural, hearty flavor. Sifting it adds lightness, helping the crumb stay fine and tender—feel that airy texture when you fold it in.
- Room-temp eggs whip up better, creating a cohesive, fluffy batter. Beating them well before mixing in ensures a smooth, evenly textured cake—watch it turn slightly frothy as it incorporates.
Notes for ingredient swaps
- Dairy-Free: Swap butter for coconut oil or vegan butter. Expect a slightly lighter crumb and a hint of coconut aroma.
- Sugar Alternatives: Use honey or maple syrup in place of granulated sugar—reduce liquid slightly to compensate for moisture.
- Egg Replacements: Flaxseed meal or applesauce can replace eggs. The texture may be a touch denser, but still moist and flavorful.
- Vanilla Essence: Substitute with vanilla bean paste or vanilla-infused oil for a deeper, more complex aroma.
- Flour Types: Whole wheat or spelt flour can replace all-purpose flour—expect a nuttier flavor and denser crumb.
- Salt: Use sea salt or kosher salt in place of regular table salt—adjust quantity slightly to taste, as saltiness varies.
- Baking Powder: If out, a quick homemade substitute is cream of tartar plus baking soda—ensure proper rise without chemical leaveners.
Equipment & Tools
- Oven: For baking the cake evenly at 175°C (350°F).
- Loaf pan: To shape and contain the batter during baking.
- Mixer (stand or hand): To cream butter and sugar and incorporate eggs smoothly.
- Spatula: To scrape the bowl and smooth the batter in the pan.
- Wire rack: To cool the cake evenly and prevent sogginess.
- Measuring cups and spoons: For accurate ingredient measurement.
- Toothpick or cake tester: To check doneness.
Step-by-step guide to vanilla pound cake
- Preheat your oven to 175°C (350°F). Grease a standard loaf pan (9×5 inches) with butter and dust with flour—this helps prevent sticking and makes for a nice crust.
- In a large mixing bowl, cream 1 cup (226g) unsalted butter and 1 1/2 cups (300g) sugar together until pale and fluffy—about 3-4 minutes on medium speed. Use a hand or stand mixer; don’t rush this step as it’s the base of a tender crumb.
- Add eggs one at a time, beating well after each addition. Make sure each egg is incorporated before adding the next; this prevents curdling. Scrape down the bowl as needed.
- Stir in 1 tablespoon (15ml) vanilla extract. It should smell intensely fragrant, like a vanilla bean bath. If you like, add a teaspoon of vanilla bean paste for extra specks and flavor.
- In a separate bowl, whisk together 2 1/2 cups (310g) all-purpose flour, 1/2 teaspoon baking powder, and a pinch of salt. Sift or whisk to aerate the flour—this keeps the cake light.
- Gradually add the flour mixture to the butter mixture, mixing on low speed. Mix just until the flour disappears; overmixing can toughen the crumb. The batter will be thick but smooth.
- Pour the batter into your prepared loaf pan. Smooth the top with a spatula. Bake in the center of the oven for about 50-60 minutes. Check for doneness around 55 minutes.
- Check for doneness by inserting a toothpick into the center; it should come out clean. The top should be golden, and the edges slightly pull away from the pan.
- If the cake is browning too quickly before the center is done, tent with foil. If it’s not done after 60 minutes, give it another 5-10 minutes, checking regularly.
- Remove from oven and let it cool in the pan for 15 minutes. Then, transfer to a wire rack to cool completely—this prevents sogginess and makes slicing easier.
- Allow the cake to rest for at least 30 minutes before slicing. It firms up slightly, making perfect, tender slices with a fine crumb.
Let the cake cool completely on a wire rack before slicing. This helps set the crumb for neat cuts and prevents crumbling. Slice with a serrated knife for clean edges, and serve plain or with seasonal toppings.
How to Know It’s Done
- The cake is golden and pulls slightly away from sides of pan.
- Toothpick inserted in center comes out clean with moist crumbs.
- The top feels firm but not hard, with a slight bounce when pressed.
Vanilla Pound Cake
Ingredients
Equipment
Method
- Preheat your oven to 175°C (350°F). Grease a 9×5-inch loaf pan with butter and lightly dust with flour, then set aside.
- Using a mixer, beat the butter and sugar together on medium speed until the mixture is pale, fluffy, and smells sweet—about 3-4 minutes. This creates a tender base for the cake.
- Add the eggs one at a time, beating well after each addition. The batter should become smooth and slightly thickened, with a shiny appearance.
- Stir in the vanilla extract until fragrant, about 10 seconds. The batter should take on a lovely vanilla aroma.
- In a separate bowl, whisk together the sifted flour, baking powder, and salt. Gradually add the dry ingredients to the wet mixture on low speed, mixing just until the flour is incorporated and the batter is smooth but not overworked.
- Pour the batter into your prepared loaf pan, using a spatula to spread it evenly. The batter should fill the pan about two-thirds full and look smooth on top.
- Bake in the preheated oven for 50-60 minutes. The top should turn a golden brown, and a toothpick inserted in the center should come out clean or with moist crumbs.
- Once baked, remove the cake from the oven and let it cool in the pan for about 15 minutes. Then transfer it to a wire rack to cool completely. This prevents sogginess and helps set the crumb.
- Allow the cake to cool fully, then slice with a serrated knife to reveal its dense, tender crumb. Serve plain or topped with seasonal fruits or a drizzle of honey for extra flavor.
Notes
Top tips for perfect pound cake
- Cream butter and sugar thoroughly: Aim for a pale, fluffy mixture; this aerates the batter for a tender crumb.
- Add eggs one at a time: Beat each egg in fully before adding the next to prevent curdling and ensure smoothness.
- Sift your flour: Lightens the texture and prevents dense spots—especially important if using whole wheat or spelt flour.
- Don’t overmix after adding flour: Mix just until incorporated; overmixing develops gluten, making the cake tough.
- Check for doneness with a toothpick: Insert into the center; it should come out clean with moist crumbs attached.
- Cool in the pan for 15 minutes: Then transfer to a wire rack; this prevents sogginess and helps set the crumb.
- Use room-temperature eggs and butter: They blend more evenly, resulting in a smooth, cohesive batter with a better rise.
Common mistakes and how to fix them
- FORGOT to check oven temperature → calibrate oven for accurate baking.
- DUMPED in all ingredients at once → mix ingredients gradually for even batter.
- OVER-TORCHED the crust → lower oven temp or cover with foil if browning too fast.
- MISSED measuring flour accurately → use a scale for precise flour quantity.
Quick fixes and pantry swaps
- When batter looks too thick, splash in a tablespoon of milk to loosen it.
- If the cake cracks on top, reduce oven temperature by 10°C (20°F) and shield with foil.
- Dumped in too much flour? Gently fold in a splash of milk until texture is smooth again.
- Over-baked and dry? Splash warm syrup or a dusting of powdered sugar before serving.
- Shield edges with foil if they turn dark too fast, preserving moist interior.
Prep, store, and reheat tips
- Prepare the batter ahead of time: Mix and refrigerate for up to 24 hours; the flavors meld and the batter firms up, making baking easier.
- Wrap cooled cake tightly in plastic wrap or store in an airtight container; it stays moist and fresh for up to 3 days at room temperature or 1 week in the fridge.
- Freeze slices or the whole cake for longer storage: Wrap well in plastic and foil; it can last up to 3 months. Thaw at room temperature for best sensory results.
- Reheat a slice briefly in the microwave—about 10-15 seconds—until warm and fragrant, with a soft, tender bite. Expect the vanilla aroma to intensify.
Top Questions About Vanilla Pound Cake
1. Should I use cold or room-temperature eggs and butter?
Use room-temperature eggs and butter for a smoother batter and better rise. Cold ingredients can cause curdling and uneven texture.
2. How do I know when the cake is fully baked?
Check for doneness around 55-60 minutes by inserting a toothpick; it should come out clean or with moist crumbs.
3. How much should I mix after adding the flour?
Use a light hand when mixing in the flour after adding it to avoid a dense, tough crumb. Mix just until combined.
4. How should I store leftover pound cake?
Store the cooled cake in an airtight container at room temperature for up to 3 days, or in the fridge for a week.
5. Can I freeze vanilla pound cake?
Yes, you can freeze the cake or slices tightly wrapped in plastic and foil for up to 3 months. Thaw at room temperature before serving.
6. How can I boost the vanilla flavor?
For a more intense vanilla flavor, substitute vanilla extract with vanilla bean paste or scrape seeds from a vanilla bean.
7. What if the cake crust burns before it’s baked through?
If the crust is browning too fast, tent the cake with foil and lower the oven temperature slightly to prevent burning.
8. How do I get neat slices?
Use a serrated knife for clean slices, and let the cake cool completely before slicing to prevent crumbling.
9. What if my batter is too thick or too runny?
If the batter is too thick, splash in a little milk to loosen it up. If too runny, add a touch more flour.
10. How do I reheat leftover cake?
Reheat slices in the microwave for 10-15 seconds until warm and fragrant, enhancing the vanilla aroma and softening the crumb.
Baking this vanilla pound cake is like revisiting an old friend—familiar, reliable, and comforting in its simplicity. Its warm vanilla scent and dense crumb make it a quiet highlight, especially when shared during slow mornings or unexpected visits.
In a world that’s constantly rushing, this cake reminds me to slow down and enjoy the small, honest pleasures. It’s a humble treat that, with just a few ingredients and a little patience, becomes something worth savoring and coming back to again and again.

Hi, I’m Ava Bennett. Welcome to Glowing With Pride. I’m Ava Bennett, a professional chef, recipe developer, and lifelong believer that food is one of the most powerful ways we express love, identity, and joy. This space was created from years of working in professional kitchens, countless late nights behind the line, and a deep desire to share food in a way that feels personal, proud, and purposeful. Cooking has never just been my career. It has been my language.
Leave a Reply